

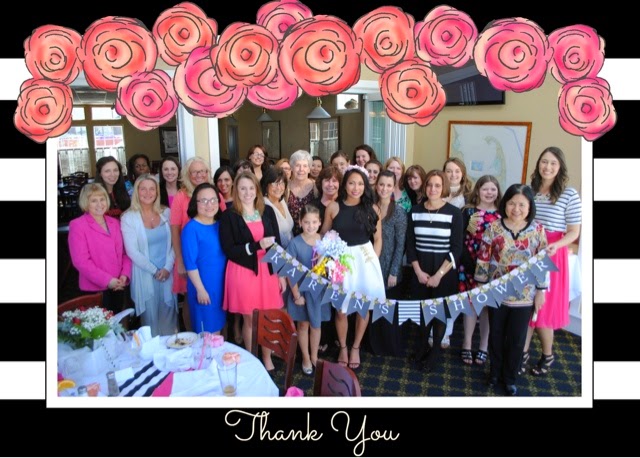
I'm not gonna lie, planning this bachelorette for my cousin Karen has taken over a year of group emails, texts, and phone calls. With Karen living in Boston and myself (her MOH) here in the San Francisco area, deciding on the location alone was a serious group effort. About half of her other bridesmaids live in the East Coast and the other half are scattered around the western part of the country (Texas, Colorado, and me in California). Given that about half of us would have to hop on a plane regardless of the location, we decided as a group that Vegas would be the most fun... and well... cuz it's VEGAS!
I have helped plan three other bachelorettes in the past and only the first one I went to was in Vegas. It was for my dear friend Angela (luv ya Ange!) and we stayed in this beautiful suite on the strip, went to clubs and got bottle service, and even saw Thunder from Down Under... you know the typical bachelorette events. The only problem was that I got sick the evening of the first full day there and truthfully never really recovered. Needless to say, I could definitely do a Vegas bachelorette do-over.
Being, the matron honor also has a whole new level or responsibilities versus being a BM that gets to go along with the plans. It was up to me to make sure everyone could budget for the trip, coordinate flight times, arrange accommodations, and plan all the events for us to do while we were there. Once all of that (or at least most of it) was accomplished, I got to start working on the really fun parts... the projects!!!!
First order of business was to create an awesome welcome bag/gift tote for the girls to have as a keepsake, but also stock with useful favors to use during the trip. I decided on custom tote bags and tumblers with a small collection of "survival kit" items inside.
Here's what I put in the survival kit:
Advil packets (from Amazon)
EOS lip balm sets (from Costco)
Metallic temporary tattoos (from Etsy)

Materials for Custom Tumblers:
Glitter Tumblers (from my local Kohl's store... I know right?!
Vinyl and transfer medium for my Silhouette Portrait (from Amazon)
Silhouette Portrait/Cricut/other custom cutting machine
Materials for Custom Tote Bags:
White canvas tote bags (from Amazon)
Striped fabric (mine were the left over runners from the shower!)
Stitch Witchery
Iron & ironing board
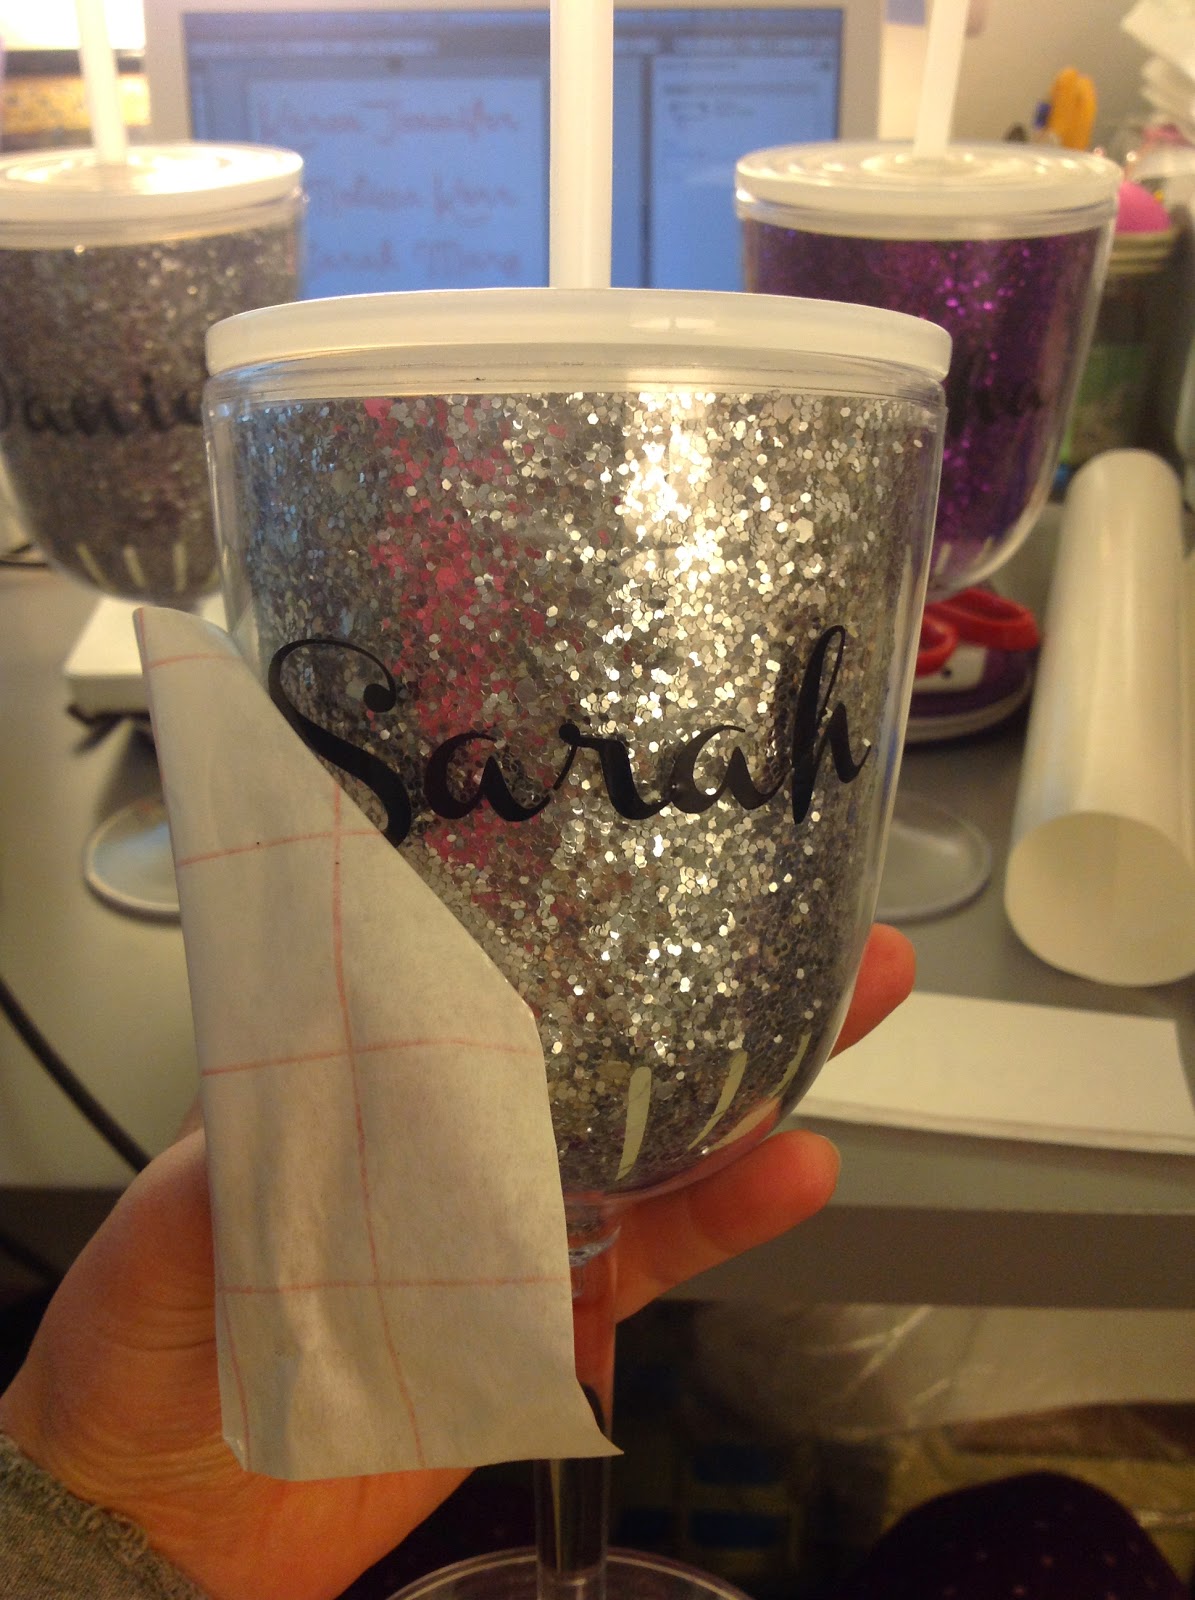
Custom Tumblers
I would like to start by saying that I don't know what I did before my husband bought me my Silhouette machine. I mean, I thought I was crafty before, but dang... I can do so much more now with this thing. Luckily, I found the glitter tumblers at my local Kohl's department store on clearance in the cosmetics section of all places and couldn't be more excited! I paid only $4.80 each for them which was purely amazing since I had been cyber stalking several blank ones online that were at the cheapest $7.00. I snatched up 8 of them right away and then realized that I had no idea how to use my Silhouette to cut vinyl.
I have used it for paper and fabric, but never to cut vinyl before, but how hard could it be? Well after a few brief YouTube tutorials I busted out my Silhouette machine and laptop and started messing around with the design software. I knew that I to have each girl's name on it and her bachelorette hashtag. To start with I spent a great deal of time selecting a beautiful font for everyone's names and the hashtag. I chose Lavendria which is beautiful and loopy and girly and usually one of my favorites. What I should have done is done a test print of only one name/hashtag before cutting out a huge sheet of these. If I had done a test one first, then I would have realized that pulling the vinyl away from these delicate filigree letters is extremely tedious work. I found myself using my husband's magnifying lamp and the tip of a sewing pin to try and remove the negative space vinyl without ripping the letters clean off... Very frustrating!
I ended up scrapping that whole first sheet and went back to the drawing board to re-design the names and the hashtag with a thicker and larger font style and size. I settled on the "Channel" font for the names (downloaded it for free from Pinterest) and one that came with my Silhouette program for the hashtag that was cursive like, but much bolder and less loopy. I still had to use the magnifying lamp to remove the negative space from the letters, but it was relatively easy compared to the first trial. Next, I cut to size a piece of the vinyl transfer medium and pressed it onto the word firmly with my scrapper tool. Then, I peeled the words up with the transfer medium and carefully smoothed it onto the tumbler. Press Press Press with the scrapper and then peel off to reveal your beautiful creation!

Custom Tote Bags
I really loved the wide black and white striped table runners I bought from Etsy for Karen's bridal shower. I mean, weren't they just adorable?!
Since I had purchased 7 of them and Karen only wanted to keep one, I had 6 others to use at my disposal... and these suckers were long! I quickly pulled up a provided heart graphic on my Silhouette software and changed the settings to cut fabric. Cut out a square of the runner to fit into the machine and in no time churned out 8 fabric hearts. Next, just busted out my Stitch Witchery and ironed one onto the front of each canvas tote. Lastly, I used my trusty Silhouette to cut out the initials of each girl using the iron-on pink glitter adhesive material. It was so simple to do, but I think it looks so chic and will be versatile for future use as well.


Put it all together:
Lastly, myself a few of the other bridesmaids traveled to Vegas a few hours before the Bride and her other BM's flight landed. We were able to do early check in at the Paris Hotel and even got the staff to help by ordering a cake, champagne, and balloons delivered to the room. All that was left to do when we arrived was to decorate the room with ribbons and I hung the banner I made for her ("Karen's Last Fling Before the Ring"). I positioned the totes with their goodies inside on the two beds in Karen's room and when she arrived it was a huge surprise! I have to admit that I couldn't have it done without the help of Sarah, Keisha, and Danielle who arrived early with me helped decorate the room. Here's the few pics that we remembered to take before the Bride arrived:


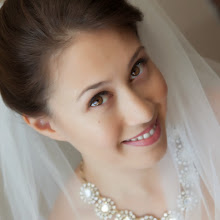
And for your viewing pleasure, here are a few more pics of the beautiful Bride and myself on our first night out on the town.
Love ya Ren!


Lastly, myself a few of the other bridesmaids traveled to Vegas a few hours before the Bride and her other BM's flight landed. We were able to do early check in at the Paris Hotel and even got the staff to help by ordering a cake, champagne, and balloons delivered to the room. All that was left to do when we arrived was to decorate the room with ribbons and I hung the banner I made for her ("Karen's Last Fling Before the Ring"). I positioned the totes with their goodies inside on the two beds in Karen's room and when she arrived it was a huge surprise! I have to admit that I couldn't have it done without the help of Sarah, Keisha, and Danielle who arrived early with me helped decorate the room. Here's the few pics that we remembered to take before the Bride arrived:


And for your viewing pleasure, here are a few more pics of the beautiful Bride and myself on our first night out on the town.
Love ya Ren!


No comments:
Post a Comment